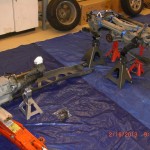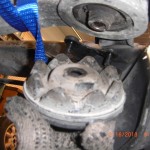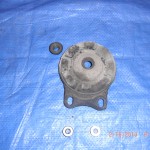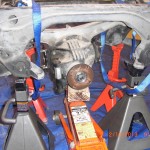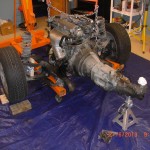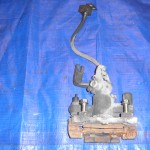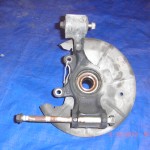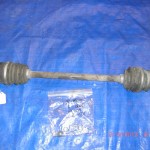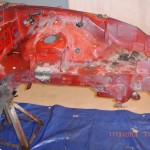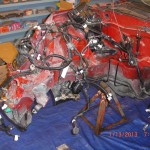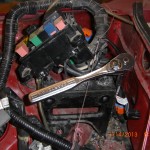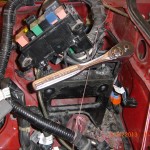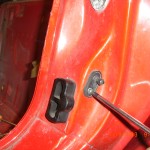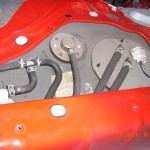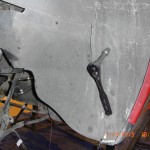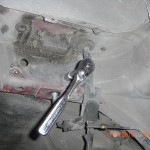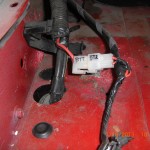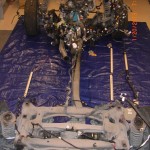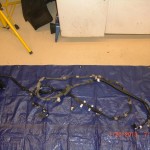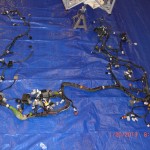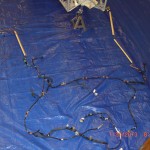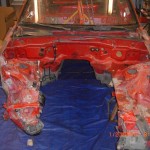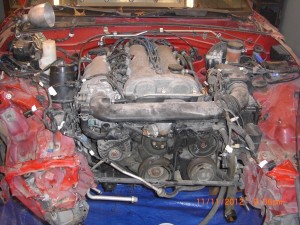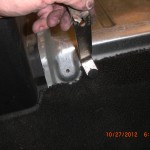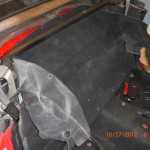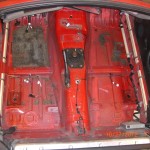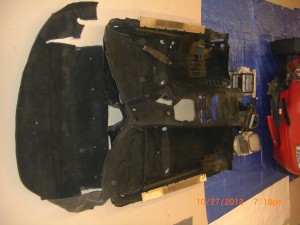
Removing miata donor parts 7 of 9, removing the PPF car now in split in half

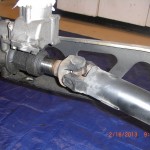
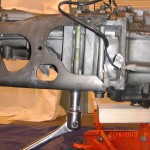
Before moving to the front calipers as I mentioned on my last post. I decide first to disconnect the rear prop flange from the rear differential flange. Refer to page 4:2 in the manual. Use a 14 mm socket and 3/8″ drive socket and moving in a diagonal sequence first loosen and then remove the 4 retaining nuts and bolts.Bag and label fasteners and put into the donor pile.Slide the drive shaft slightly forward to clear differential flange. Since I have yet to drain my fluids at this time I did not remove the prop-shaft, I simply tied up with twin for the moment and moved to the front calipers, but now would be a good time to drain fluids and shaft.

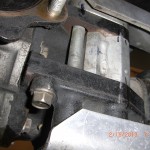
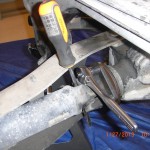
drive shaft rear bolts

Remove 4 rear drive shaft to differential flange bolts

flange bolts removed and prop-shaft slid forward

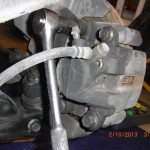
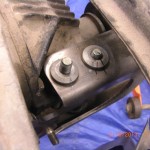
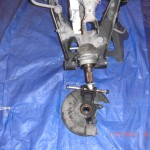
As I left off on the last post I next removed the front brake calipers and rotors(temporarily). Refer to pages 9:10 in the manual for instruction. Use a 14 mm socket to remove the 2 caliper to upright mounting bolts.

Removing front caliper bolts

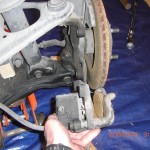
After you have caliper removed repeat for other side and put the calipers and mounting bolts into the required donor pile of parts.The brake disk is now free and and can be lifted off of the hub and removed. You will need to do this in order to set up your dial indicator and check the front hub bearings for play. I did not bother to check the any of the brake disk for run out as I intend to use performance slotted disk all around, but if you are re-using the disk now would be a good time to check the disk for run-out. Refer to manual page 9:10 for instruction on run out check.

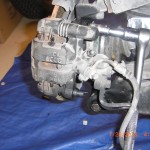
front caliper

Remove caliper

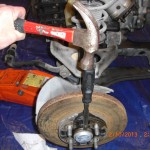
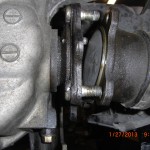
Refer to page 9:21 in manual. I needed to use a wood chisel to help separate the rather tight front hub dust covers. I position the sharp edge of the  chisel at the seam( looking for the widest part) and tap chisel with hammer and moving in a circular pattern continue the tapping until you have created a small gap. Then you can use a pry bar or more blunt end screw driver and hammer to further separate the dust cover. Then you can grab with channel lock style pliers and remove completely.

Seperate dust cover

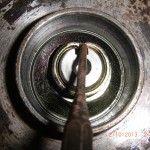
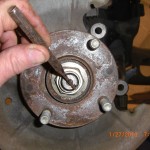
Straighten the hub nut locking stake

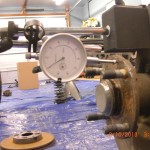
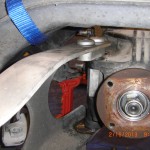
Next in similar fashion to what I did at the rear, I set up my dial indicator to check for lateral play of the front hub bearing. Max allowable play is .002, Mine was less than .001, so they are usable. Reset the dial indicator and repeat check for other hub.

check front hub

Dial indicator set up to check front hub wheel bearings


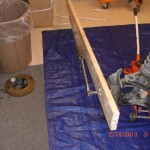
After this wheel bearing check. I prepare to loosen the hub retaining nut and used a drift punch to straighten the hub nut stakes prior to loosening hub retaining bolts this is the same procedure we already did for the rear. Using 1 1/8″ socket with breaker and pipe extension for leverage and the 2×6 SST in place to prevent the hub from rotating I  used my weight as I stood on the pipe and broke the 159 Ft lb tight hub nut loose.

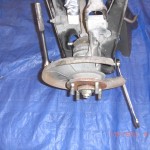
SST in position ready to loosen hub nut

I should note I did clamp a pair of channel locks onto the steering rack shaft as the wheels wanted to turn when torqued.Repeat loosening procedure for other side, but do not remove hub nut and hubs at this time, I just want to break loose while I have the engine weight and PPF in place.At this time I replaced the brake disk and replaced both front wheels and tires to allow a stable platform to support engine weight while I return my attention to removal of rear differential.

As we are now ready to remove the rear differential I drained all the fluids. Use  a 24 mm socket for the rear differential and the transmission drain plug and 19 mm socket for the engine drain plug.

draining diff oil

Draining the differential oil

I did use some cheesecloth as a screen to train the tranny oil into just to see if there are any big pieces of metal that should not be in the oil. There were none, good. Which makes me ask, is there an aftermarket source for magnetic miata drain plugs, may be a good idea to use one. Next I decide to remove the PPF, In doing so the front sub-frame and transmission and rear sub-frame with diff and control arms still attached will need to be able to support themselves independently.So in preparation of PPF removal I support the rear sub-frame with 4 jack stands. I support the transmission with a single jack stand and the front sub-frame is supported by the wheels and tire which we put back on. For safety , I did wrap a couple of strap tie downs around the diff just to make sure it would not hit the floor if it slip off the jack during removal. As it turned out this was not necessary,but why not.

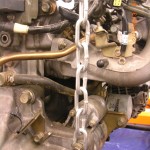
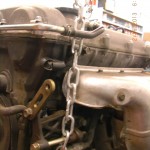
An issue I had was where to attach the chains to pull the engine. The manual says to use the factory engine removal hoops to attach the chains to. Well my car does not have factory engine removal hoops. On the drivers side at the front of the head near the valve cover part line is what looks to be where the hoop is located in the manual is a bolt hole that may work, but diagonally on the passenger side rear there is not counterpart. I do see some potential holes but all the potential suspects on the head do not seem substantial enough to me and I am reluctant to use for fear of cracking the head. So after looking around, I decide to partially remove the upper most starter bolt and attach a chain here for the passenger side rear , and at drivers side front I attached chain to the old and now unused but very strong AC compressor bolt. See pics. But the concern I do have about these location is not the strength but whether the C of G of these locations is high enough to prevent a rotation during lift. It may not be ideal but I believe I am good. We will find out soon if these are good hoist attach points.

hoist location

I used starter bolt as a chain host location

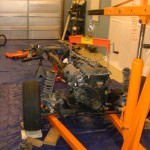
I attach the chains properly using by load leveler and position the engine crane in position and apply a very slight preloaded to chains just to make sure all is secure. So now I have the rear sub supported by 4 stands, the front sub-frame supported by wheels and engine hoist and tranny by jack stand and a floor jack in position below the rear differential


.

engine crane in position

chain hoist location

AC bolt being used for engine hoist location


So now we are ready to proceed and should have all our supports in position to finish the harvest. Next I break loose and loosen the rear differential carrier mountings. I want to loosen these carrier bolts while the differential is still attached to the PPF so we can use the weight of the PPF to torque against to loosen the carrier mounts. For reference page 4:27   11.0 .

Use 12 mm socket to loosen two nuts and 17 mm socket to loosen larger center mounting bolt that is torqued to 62 to 72 ft lb. Just loosen for now. Repeat for opposite side carrier mount. We will remove carrier mounts  after we have removed the PPF.

Since all fluids are drained  and there will not be any oil to be spilled. I now removed the prop-shaft from the transmission tail-housing . Just slide the pro-shaft rearward and it almost removes itself. Some builder have the prop-shaft shortened to suit the VortX. The factory Miata does not have serviceable U joints. I will be using a custom length drive-shaft with serviceable U joints. These custom drive-shaft will be available from Fastcraft motorsport for approx. $249.00 and you have a shaft that can be rebuilt.So for me the prop-shaft is for the e-bay pile. But some builders do use it and this is a viable idea if you have a local shop that can shorten the donor shaft.

slide propshaft to rear to remove


driveshaft

Removed propshaft


Refer to page 4:3 in the manual for PPF removal instruction.

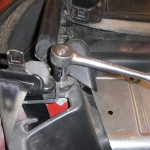
First remove the support bracket between the transmission tail casting and the PPF. Usa a 17 mm socket to remove bolt holding bracket to PPF and 14 mm socket to remove 2 bolts holding bracket to transmission . I am not sure at this time if this bracket is required for the VortX so I bagged up this bracket and hardware and placed in the “maybe pile of parts”

trans bracket

Reomve the PPF to transmission mounting bracket

PPF to tailhousing bracket

At the front of the PPF two long bolts attach transmission to PPF. Use  17 mm socket to remove these bolts.

.

Top view pic .Witness marks per manual.These collars are not removed to remove the PPF. view of differential spacer. This is used for the VortX

After both bolts are removed you need to remove the “collar” located at the bottom of the PPF at the front bolt location. This collar passes through the PPF and the inner part inserts into the differential mount casting.There is a ready made relief in the rear of this collar to insert a pry-bar. Use some WD40 to assist. I had a pry-bar the exact size needed and was easy to start, but do not pry too hard as you will only jam it as you pull form one side. After I got it started I grabbed in by hand and tapped it with a hammer and it easily removed. This must be removed. Once removed we are read to remove the PDF and split the car in half so to speak.

use prybar to remove collar.

We are now ready to remove the PPF as it is free. At the rear it can be move sideways until clear of the differential casing. Some wiggling and some WD40 may be helpful here, once free of the rear differential casing you can easily pull the PPF rearward to remove from the transmission casing.The PPF is surprisingly light, seems to weigh less than 20 LBS.

Rear PPF

Sliding PPF off differential casing


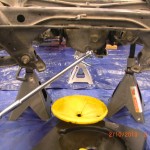
The donor is now split in half and we are ready to remove the rear diff now supported independently by 4 jack stands. First position the floor jack under the differential to assist removal.

SPLITTSVILLE


Refer back to manual page 4:27  11. Now that the PPF is removed from the differential  we are ready to completely remove the the differential carrier mountings. Use 12 mm socket to remove the two carrier mounting bolts and 17 mm socket to to remove the center bolt. Repeat for other side.

Removing differentiall carrier mounting

differential carrier mount


The differential is now free and can be lowered with the floor jack to ground.

jack in position ready to lower diff

I like this picture as it is all that is left of the original donor and the disassembly will be the subject of our next post.


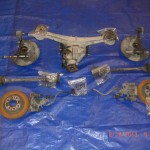
Rear doner parts
grouping of rear drivetrain donor parts required for the VortX

This is a group portrait of the rear drive-line donor parts


Some “before” pics of donor parts to be used  to compare with after refurbishment.

Rear brake caliper

Rear brake caliper before refurbishment

Rear upright, with hub and backing disk backing plate

halfshaft


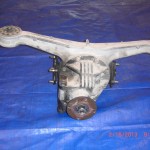
rear diff

Close up of differential and spacer unit


Well that completes this post and I can see the finish line of the deconstruction process, after-all there is not much left.


Removing miata donor parts 6 of 9, deconstructing the miata continues

I was not too pleased with my last post regarding grouping the pictures toward the end of the post and will return to mixing the pictures within the commentary. Besides deconstructing the Miata, I am using these pages to prepare for writing the VortX miata assembly blog. So just bear with me as I experiment with this forum.

Now that the wiring harness is removed, we can finish removing the remaining donor parts, which is most of the drive-train all still connected to the PPF and front and rear sub-frames..With the body removed I have excellent access and this should make the rest of this deconstruction process go rather smoothly.

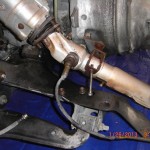
Since the down pipe still attached appears to be lower than the PPF and may possible contact the ground when the differential is removed from the PPF,I decide now would be a good time to remove the down pipe with the O2 sensor still attached to get it out of the way.Use a 12 mm socket to remove exhaust clamp bolt. Use 14 mm socket to remove down-pipe to exhaust header nuts.The nut closest to the block is difficult to remove, you will need to use a U-Joint swivel with 3 inch extension and with this set up I was able to remove, see pic,I would loosen this nut first. I intend to Turbo my VortX build and will need a custom down pipe. For those of you building a normally aspirated engine I would put this in the maybe required pile of parts. I will clarify if needed in a later post.

Using U joint swivel and extension to reach

You will need a U joint swivel and short extension to reach this bolt

Downpipe loose ready to remove

Down pipe with O2 sensor ready for removal

Next I turned my attention to the rear. I should mention, make sure you have the rear sub-frame  securely supported on jack stands and the front wheels chocked to prevent rolling off the stands. With rear wheels removed I decide to remove both rear brake caliper assembles. Use 14 mm socket to remove two retaining bolts per caliper. But bolts and calipers into the donor pile.Slide off brake rotors put in donor pile.

Remove Rear Calipers.


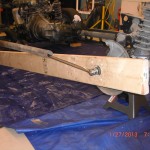
Now I decide the rear hubs, hub carriers(uprights) and CV axle drive shifts are my focus. To remove the rear hubs refer to page 9:21 in the manual. I first set up my magnetic  base and dial indicator to check wheel bearing play. Mine is about 1/10,000 so excellent.As I read instruction 20 on page 9:22 Then I realize I have one of those OOPS moments. I started this deconstruction process by asking myself ,”where do I start?”. Well I think I now have the answer to this question. I no longer have a hand brake or any hydraulic brake system to prevent the hubs and axles from turning when  the axle nut that is retained by 216 ft lb of torque is loosened. So if you are following along and have not removed your donor cars brakes, I would for a first step check your front and rear hub run-out per the manual and I would use the still operable brake system and break loose the the hub nuts, drive-shaft to differential and axle CV joint to differential bolts. Do not remove, just break them loose. But since I no longer have this option, I had to make my own Special Service Tool(SST) to remove the axle nuts and drive shaft bolts. This was done for the cost of a 2x6x8. I cut the 2×6 down to about 7 feet. Using a blue magic marker I applied the marker to the ends of the hub bolts and with one end of the 2×6 just behind the front tire I placed the opposite end of the  2×6 up to the still wet hub bolt ends to transfer the blue marker ink onto the 2×6.I drilled these holes with a drill bit, sorry I did not record the size but just pick one just slightly larger than the hub bolts. Now  I  applied the blue marker to the end of the threads where the hub nut is attached. I used a small 3/16″ drill bit to drill a pilot hole into the center of this larger blue mark.  I then used a 2″ hole saw and using the pilot hole as my guide I sawed from both sides of the 2×6 to center to remove the round wood waste. I now would recommend a slightly larger 2 1/8″ hole saw if available but the 2″ got the job done. So what I am going to do is place the drilled holes over the wheel hub bolts to make a long lever to press against the floor as I loosed the hub nuts. To remove the drivers side hub nut , I place one end of the 2×6 is just behind front tire. This will prevent rotation to left as we loosen. I am able to use the large 2 inch center hole to access the hub bolt with the socket.  Now with this SST in position I am ready to proceed following the instructions on page 9-22 in the manual to remove hub. But at this time before removing the hub nut, and with the SST in position  take some time and break lose the nuts retaining the inner CV joints to differential connection joint for both axles. Use a 14 mm wrench or 14 mm 3/8″ drive socket as 1/2″ drive will not fit to break loose these bolts. Then using a 14mm 3/8″ drive socket brake loose and if you want you  can remove the 4 bolts retaining the rear drive shaft yoke to the differential mounting flange. We really do not need to mark drive-shaft position to differential as we will be using a custom or modified shaft. The reasoning you  want to do loosen the axle bolts prior to removing both rear Hubs as after you have the  hubs removed, you will not be able to use the 2×6 SST to prevent rotation of axles. OK now we can proceed to remove hubs and axles.

I did not have a 29 mm socket which is the correct size to remove the hub nuts, so I followed the advice in the manual and used a 1 1/8″  socket size and it fit perfectly. Before you attempt to loosen the hub nut make sure you use a drift punch to straighten out the locking staked portion of the nut. It is on tight enough without forgetting to this step.

break loose rear hub bolts

SST used to retain hub rotation.

Release staking

Using a drift to release hub nut staking

With 1 1/8″ socket over nut and using my 1/2″ breaker bar with about a 3ft extension of black pipe positioned to gain leverage, I placed one foot on the SST and pushed down on the breaker bar until it broke loose. Actually it broke loose  rather easily. So after doing it this way using the 2×6 as a SST, this method is actually not a bad alternative. Next I used a 14 mm socket to remove the single bolt that connects the sping/damper unit to the lower control arm.

remove lower rear strut bolt.

Repeat to other side and place the spring units into the e-bay pile.Use a 14 mm socket and 14 mm wrench remove upper upright bolt.

remove upper control arm bolt

Use a  17 mm socket & 21 mm wrench or socket and remove the long lower upright pivot bolt.

removing rear upright

remove lower upright bolt

Apply some WD 40 to aid removal of this long bolt. Now we are ready to remove the unrestrained upright hub unit from the axle splines. One side of my Donner  the hub unit  separated from the splines with no effort at all, for the other side I followed the advice of the manual by placing the hub nut over the axle and tapping with hammer and pulling

upright removed

Rear hub removed

simultaneously after a couple of rather easy taps the hub came free from the splines. Remove upright and place upright and bolts in the required donor pile. Repeat for other side. I did mark the location of the axle shafts to the differential mounting flange as manual suggest. Using 14 mm socket remove the all ready loosed axle bolts , remove axle,label and put into the donor pile. Repeat for other side to remove axle.We  now

inner rear axle

inner rear axle nuts removed

have both rear calipers and mount assemblies, 2rear brake rotors, 2 rear uprights and hub assemblies, 2 rear CV joint half shat axles and all associated hardware all labeled in the donor pile.And  the down pipe with O2 sensor in the “maybe pile”.

I next intended to go ahead and remove the rear differential as this is the last major donor part that is connected to the rear sub-frame.But I decide it may be  best at this time and a good idea while the car is securely supported at rear by the rear sub-frame( as the ppf is directly connected to the differential) to remove the front calipers, rotors and to break loose the front hub nuts as we can use the mass of the engine to work against to help remove the tightly torqued hub nuts.


Removing miata donor parts 5 of 9,How do you remove a Miata Wire harness?

Since last post I removed a few items for the e-bay pile. I removed the heater core, brake master cylinder with  booster, wiper motor, hand brake handle and all it’s cables.The VortX kit comes with a new handbrake assemble and cables  so we can put these in the e-bay pile

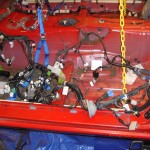
I also removed the clutch master cylinder and throttle cable and placed these items in the donor keeper pile. All of the above items were easy and rather self explanatory to remove, I did not consult the manual but if you need further instruction please refer to the appropriate section in the manual. As I was removing these parts I was scratching my head on how to proceed with the harness removal.Should I remove the wires inside the car through the firewall to the engine compartment or should all the wires in the engine compartment be pulled into the interior. At first with all the wires hanging in the engine compartment I considered the first option thinking this would be path of least resistance, but as it turns this is not the case as there is only one way to remove the harness or harnesses. I am getting a little ahead of myself but I think it would be helpful now to explain what we are removing. There are are actually 4 harness. I do not know what the proper names are but this is what I will call them. The first harness I call the power supply harness. This harness is the one that runs along the PPF( remember removing all those clips) and runs under the car and up through a grommet to access the trunk and connects to the battery at one end and at the opposite end it is hard wired to main fuse box located on the passenger side fender. The next harness I will call the central harness, this is the biggest harness. This central harness is located inside the car up against the firewall and has many circuits that pass through grommets located on the firewall. Along the drivers side foot well this central harness connects to what the the manual refers to as fuse block No. 1. The next harness I call the rear harness. It connect to the main harness along the passenger foot well and supplies items like the fuel pump, seat belts and rear lighting. The fourth and shortest harness is the ECU harness. This one runs along the passenger door sill and connects to the ECU located behind passenger seat and connects to the Central harness at the passenger foot well area. The central harness is the main harness, It contains the wiring to the front lighting, all the engine sensors, airbags system, instrument panel, dash, interior lighting, actually everything since the other 3 harness all connect to this main central harness. So that is the general layout. But how to remove?. There are two rubber grommets, one rather large about 3″ diameter near the passenger side foot well in the firewall and another not as large grommet hole  below the master cylinder assembly drivers side. Since fuse block No. 1 is too large to pass through the hole on the drivers side it becomes obvious all under hood wiring attached to fuse block No. 1 must pass through hole into the passenger compartment. Also after inspection of the main fuse box, You can see that there are several connectors that are are part of the central harness that plug into the main fuse box and supply harness. It is now obvious that the main fuse box will and supply harness will be not be passing through the 3″ firewall hole. So basically all the wires in the engine compartment and there are a bunch of them are going to have to pass through the firewall grommet holes into the interior. The supply harness will be removed from beneath the car after it is unplugged from the central harness at the main fuse block.

To make easier for this blog writer I will include a progressive picture gallery at end of this post.

So this is the plan of attack.I started from the drivers side and work my way to the passenger side by removing all the interior harness restraints, hold downs, wire ties and plastic clips. Of course I am marking and label all connectors as I disconnect. I remove flasher relay, the clutch pedal release  sensor, brake switch. Eventually the harness is completely free. I then remove the blue( I believe this is an ECU for the airbag system). Next I used a 12 mm socket to remove 1 bolt and plastic speed nut that retains the clutch pedal and box and used a 10 mm socket to remove clutch pedal depression switch from the pedal box. Do not discard this does switch as it does send a signal to the ECU. we may need it. Next I removed the hood release cable and put in e-bay pile along with clutch pedal box. Next up I removed the throttle and brake pedal box using a 10 mm socket to remove 2 bolts and put in the e-bay pile, this will probably end up being scrap.Next I removed the white plastic speed nuts that help to retain the firewall sound deadening blanket and put this blanket in scrap pile. Now the central harness is completely accessible in the passenger compartment so I set my attention part of the central harness that has connections along the drivers side inner fender.

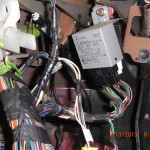
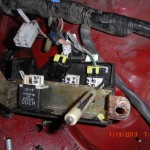
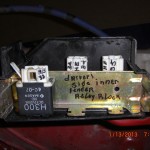
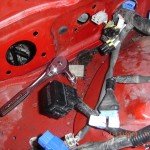
First from the engine compartment I release the drives side rubber firewall grommet by pushing to the inside of the firewall.Next up I release the black diagnostic connector from it’s bracket. Then with 10 mm socket I remove nuts holding the relay box to the inner fender. Disconnect the blue/ orange air bag harness. I then number the central harness connectors at the relay box, see picture. There is a central harness ground bolt that I almost forgot to remove,see pic.Now all the drivers side harness engine compartment wires are free and we can pull the harness through the grommet hole  to inside passenger compartment. I do this by standing by the window pillar and using 1 hand inside pulling and 1 hand in the engine compartment carefully guiding the wires through the grommet hole.

One fender down and one to go. The passenger side inner fender does retain the majority of the engine compartment central harness as this part of the harness has the majority of the engine management sensors and it looks a mess and I wondered how all that will pass through the grommet. Use a 10 mm socket to remove 3 bolts that retain the main fuse box bracket. I needed to remove an orange and blue airbag connector to get access to the one of the retaining bolts.I then labeled all the connectors at the main fuse box.The photographer must have been on break as I did not take a pick of the labled main fuse box, but it was labled similar to relay box pictured. Next using 10 mm socket remove fasteners retaining the  EGR selonids bracket located on passenger side fender,Label and disconet solenoid connectors.Of course at this time we are saving the EGR solenoids, relays and all wire harness items for the donor pile. Deletion of wires and circuit will be for anther day. I look over the harness and I do not see any relay or part of harness that appears to large to pass thorough the grommet, which we now release this grommet at firewall in similar fashion as we did for drivers side by pushing into the interiour from the engine compartment. Not hard just be carefull not to pinch wires. I seem to have forgot my duties of photographer, as I quickly got involved in carefully passing the wire through the firewall. I found on my car a part of my harness was folded over and taped with black electrical tape making passage difficult. See pic.I carefully removed the electrical tape making it easier to pass harness. Actually it was not difficult and soon the entire harness was inside of the passenger compartment and the engine compartment now looks naked. Next I used a 10 mm socket to remove 3 bolts that retain the ECU which is located rear of passenger seat. Remove any clips along passenger door sill area that retain harness and remove harness and ECU. If doing this again I would probably remove the ECU and harness first as it only takes 10 just to get out of harms way.At this time you can also pick the  the central harness up off the drivers compartment floor and put in safe place.I put each of the 4 harness in thier own cardboard box for safe keeping. At this point I had a feeling of victory but we are not done yet, we still have the rear harness and supply harness to remove but this is much easier and faster to remove that the central. First you need to remove the rear cross support, this is about a 1.5 inch black bar behind the seat headrest area. Use a 17 mm socket to remove 1 bolt at each end. Remove rear black plastic trim directly below the cross bar support to allow access to bolts retaining the unpainted alloy rear harness cover. Using a 10 mm socket remove the 16 bolts that retain this cover, remove cover and the majority of rear harness is now accessible. For this next step I actually had to put the top up temporarily to access the fuel tank cover bolts.Use 10 mm socket to remove the 6 bolts that hold down the fuel tank sending unit unpainted cover. Next using No 2 Phillips remove door dome light switches. Next I  removed rear harness grounding  bolt with a 10 mm socket which is located  near drivers side real lap belt retaining bolt. Next I labeled the fuel pump/sending unit connector and disconnected and removed rubber grommet and pulled connector though grommet hole. Next using 10 mm socket I removed the fuel tank check valve and using a Phillips screwdriver removed 4  screws retaining the fuel tank vapor valve and rubber gasket. I put these in the maybe pile even though the VortX does come with it’s own vent valve. I removed any all all clips and ties retaining the harness in the area of the car.

Next I had to remove the passenger side inner fender splash guard using 10 mm socket to remove 4 bolts.This will give you access to remove 1 bolt using same 10 mm socket the retains the power delivery harness. From passenger side of car push the rubber grommet to ward underside of car where the delivery harness enters the trunk. Feed the battery end of the harness through the grommet hole. Make sure all harness plastic retainers are free, This harness should now be laying on the garage floor underneath the car, I had mine tied up with some twine after removing from PPF, So all I had to to was cut twine and go to front of car at the main fuse box end pull harness from under car and put in storage box. Now just double check all clips of the rear harness are removed , there are several in the trunk area. Carefully feed this harness from the trunk area to the passenger compartment and remove harness from passenger compartment, of course this is a donor part put in box for safe keeping. Well now is time for the victory dance, instead I think I have cold one and write this blog. Looking over at the donor car. There is not much still connected to the body. So how do you remove a wire harness? Strip her till she is naked, until all that is left is the harness, but you can leave her top on.

Remove Diagnostic connector

Remove wire ties, flasher, pedal box bolts,

connector labled, brake switch removed, pedal box bolts

label connectors and remove ties

remove air bag eco, label connectors

remove pedal box

remove throttle and brake pedal box

remove pedal box

disconect central harness from PCM  and rear harness at enger side foot well

remove relay bracket, disconect blue,org airbag connector

removing connectors from relay block

Central harness D. side to be pulled to inside

labeling example of relay box

remove ground before pulling wires

harness being guided into passenger compartment

diagnostic concector fits easily through grommet

going ,going

all drivers side is now inside passenger compartment

Gone

all those wire need to get inside

removing main block retaining bolt

remove block bracket to access grommet

label EGR solenoids

cutting black tape to ease harness removal


central harness removed

remove cross bar bolts

rear harness exposed

rear harness location

removing rear harness ground

remove door light swithes

fuel tank vapor valve, fuel pump/sending unit

remove rear passenger side splash guard

delivery harness hold and grommet

disconect rear harness and grommet

all 4 harness displayed on chassis as in car

disconect rear harness and grommet

power delivery harness main block

Central harness layed out as in car

Rear harness as in car

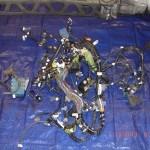
stripped naked


Removing miata donor parts 4 of 9 body and PPF SEPERATED!

SEPERATED

SEPERATED

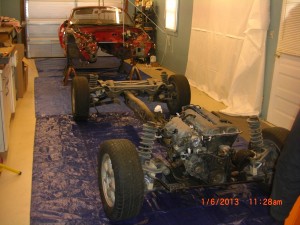
As I mentioned in my last post I now am turning attention to removal of engine and transmission unit. I have decided to do this by separating the body from the power train chassis unit. To explain if you are not familiar with the design of the Miata. The engine mounts, engine and the entire front suspension are mounted to a front sub frame. This front sub frame is bolted to a PPF (Power Plant Frame) which is basically a stamped C shape channel that connects to the transmission at the front and connects to the rear differential which in turn is bolted to the rear sub frame and the entire rear suspension. The body unit is connected to the front sub frame by 10 bolts and to the rear sub frame by 6 bolts. So the plan is to separate the body unit from this chassis unit and lift the body unit high enough and roll the chassis unit forward and set the body unit down on Jack stands. This will allow me unrestricted access to remove the wire harness from the body unit and easy access to all donor parts of the rolling chassis unit.

As a prerequisite please read Chapter 3 pages 3:1 to 3:11 and especially sections 4:1 to 4:81 in the manual to prepare for this procedure. IMPORTANT if you plan to remove the body as a unit as I did in my build do not proceed farther than step 4:81 in the manual.

It is my opinion I would definitely remove the radiator with fans attached and AC condenser if your car is so equipped. You will find this recommendation in the instructions in the manual, but not until instruction 64, that in retrospect the writer would recommend removal of the radiator and fans. In my case as you already know I had no choice do to crash damage. But having completed this process I certainly recommend to do so and may actually recommend to go ahead and take the ½ hour of time to saw the core support out of the way especially if you plan to scrap the body unit. This allows you much easier access to remove some the engine harness connectors which for me were the most time consuming part of this process.

Essentially just follow the instructions in the manual starting on page 4:1 section 4 Removal of engine (with transmission). I will add my comments to number instructions in the manual.

10) This shift boot gator has a formable base, so I place this part in a new pile of parts that I have designated “maybe” in other words not to discard at this time as they may have a possible use in the kit such as this boot gator, this one seems a bit too heavy in weight for my liking. So I now have 4 designated piles. The Required pile, the e-bay to sell pile, the scrap pile and now the “maybe” pile.

17) & 18) at this stage I did not drain fluids, can if you want as you will want to change later.

38) My car used 14 mm socket not 17 as noted.

43) Believe it or not removing these clips on the oil cooler hose on right side of engine for me was rather difficult and took me too much time, this is why I recommend removal of radiator as this allows you better access. Patience required.

47) Be prepared for this step will save you some time. I did not up until this step remove the fuel system pressure as recommended in manual previously. I would wait until now as you can use the fuel pressure to siphon the tank. Get yourself 5 ft of 5/16” I.D fuel line and have on hand enough gas containers to hold all the fuel you have in the tank. Put you fuel container in position and put one end of drain hose in it. Remove the hose clamps as noted in 47. The hose that connects to the front of the fuel rail is the supply line and will be under slight pressure.  Have small plastic (I used an old cool whip container) bowl to collect any spilled fuel. As soon as you pull the rubber hose off the metal (from tank) supply line quickly slip one end of the 5/16 fuel hose on and you will find pressure and ensuing siphon action will drain your tank! My car had more fuel than I thought and I had to vise grip my drain hose so I could make a run to the local Wal-Mart to buy another 5 gal gas can.

61) I deviated a bit here. Using 10 mm socket I removed the bolts that held a metal angle that secures the radiator inlet metal tube to the left front inner fender. I then removed the hose clamps from the water pump inlet casting. I did this to allow better access to the AC and power steering pumps. My notes were a bit vague here, but around this time I also remove the power steering supply and return piping that looked to be in my way. For a car you plan to put back on the road you would not want to do this. But we have no use for the PS rack lines so off they went and out of the way.

70) Not necessary to remove O2 sensor if using the body as a unit but can if you like.

71) I removed exhaust from down pipe back including the catalytic converter. Save the converter.

74) Not necessary to remove slave from transmission. I simple disconnected the slave’s metal supply line at the chassis attach bracket, leaving the coiled line still attached to the slave. But you can release metal line at slave if you like. I removed the slave cap and put some plastic food wrap over the top of reservoir and replaced cap to prevent spills. This worked for the slave but not for the brake lines.

77) This went easier than I thought. You will need to reach between top of transmission and body to release metal harness clamps. The clamps bend easily. This will allow you to pull the harness toward the passenger side a bit to release the two white connector from the passenger (RT side forUSA) that goes to the neutral switch. I could not get the two black bullet connectors to release. So as the manual suggest I used a 1” open end wrench to unscrew the reverse switch from the transmission. But be careful here. On my car there was some black electrical tape wrapped around the two supply wires about 2 inches from end of switch. You will need to remove this tape, If not the wires will not be able to “twist” when you unscrew the switch and will assuredly break.

79)-81) make sure the supply harness is  free from the PPF and power train.As noted in manual there are severe plastic harness clamps that attach to the vertival face of the PPF from the transmission to the differential.All these plastic clamp need removed. Just leverage them from the PPF. My car had an appox. 1 inch square plastic harness to body support in the location near the right rear wheel area that was removed using a 10 mm socket. This support was not noted in the manual. I also believe I had an additional body ground not noted. So just a heads up as your car may vary so just be careful to make sure the harness is free of the PPF. Remember the harness will stay with the body when it is lifted to separate it from the PPF and sub frames.I used some twine to tie the now loose harness out of harms way.

IMPORTANT!  Stop at step 81 in the manual do not precede with steps 82 to 95 if you intend to remove body as unit as you need to leave the PPF attached to the transmission and sub frames.

AT this point I was no longer following the manual, usually dangerous for me. I looked the over the job, keeping in mind we are going to lift the body off to see what would cause interference to this process.

So I removed all the AC supply and return lines and brackets. I used some twin to tie the main wire harness out of harms way. I removed the speedo cable and put in the donor pile, you will need it if you use the Miata instrument pod.

I released the front and rear brake flex lines at body bracket, because this seemed easier access. I left flex lines attached to calipers, but you could release at calipers.

Next I disconnected the E brake lines from pivot arms. Use 12 mm and 14mm sockets. Loosen cable from bracket, slide cable out of arm and using pliers rotate cable bug 90 degrees and slide out of arm, easy.

At the front I removed the U shaped sway bar brackets from the body.

Sway Bar bracket

You do not need to remove the sway bar from the suspension but you must remove these brackets as these brackets are the only front suspension parts that connect to the body. Note there is a vent hose that connects from the charcoal canister to a static area in the front sub frame on left side of frame, this was not noted in manual. Pull this hose off plastic connector. If this was an airplane this would be a great place for a Pitot tube static port.
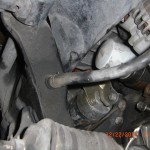
Static port vent in from subframe

I finally am satisfied all is clear to lift the body. So now is a good time to decide how I want to lift the body. But first I decided to remove some body parts for the e-bay for sale pile; this also has the benefit of removing some of the weight we need to lift.

So let’s remove the doors. Refer to chapter 11, sec 9 door in the manual. Using a screw driver lever the plastic grommet from the door post and not the door as manual indicated and pull connectors through grommet hole and separate connectors. Use 12 mm socket to remove hinges. If you leave the door shut to support non hinged end, them remove the hinge bolts. Then with on hand supporting the door near post and opening the door with other I was able to remove the door without assistance, but would be easier with a helper. Be careful I almost dropped the first one. But I had a place a cardboard box just in case, I needed it.

Next I removed the trunk lid see chapter 11, sec 6 in the manual. Use a 10 mm socket to remove trunk light harness connector to trunk lid.

Next up tail lights refer to chapter 7, section 30 in manual. 10 mm deep socket required.

Remove the license plate lights and brackets.

Then I removed the rear bumper and fascia and side marker lights as one unit as outlined in chapter 11, section 9.

Well now back to how to lift the body. I have never done this before so I am not sure how much lift I will need, so I guestimate is in order. I decide I will leave the damper struts attached to the lower suspension arms, so I will need to lift the body unit high enough for the rear dampers to clear the under body as I roll the chassis forward. I roughly estimate 24 inches of lift should do it. I have a standard ceiling height. I have at least 32 inches from top of windshield frame to ceiling clearance and the body is currently sitting on 20 inch jack stands. So I should have plenty of room after the car is sitting on its tires, this is good news for any builders working in shops without high ceilings. I have a crane style engine lift and I also own a 1 ton harbor freight chain hoist. My original plan was to use two chain hoist one front and one rear as I would not have to concern myself with balancing the body during the lift, but I decided to be brave and cheap and use the single chain hoist with the $25.00 Harbor freight 2 ton load leveler I bought previously for engine removals. Caution must be used here. Again I am estimating I will be lifting a body unit weight just shy of 1000 pounds or so. So you will need to be use good judgment in how you attach the chain hoist to your ceiling supports. Consult a professional if needed. In my case, my ceiling joist are 16inches on center and 6 inches in depth. I constructed two beams using four 2×4 x 8 ft. I screwed two 2×4 by eights togetherto make each of the support beams. I place each support beam across 6 of my ceiling joist within 2 feet of the bearing wall supports. If my joist were 2 ft on center I would have used 2×6 min material for the support beams. I could have used say a single 2 x 8 x 10 at the center line but I did not want to apply the vertical loads where they would create max bending moment on the ceiling joist, this is why I used the two separate beams located within 2 feet of the end walls. I then nailed together two 2x6x10 to make a crane beam with and additional 2 x 4 x 8 cap plate centered over the 2×6 x 10 beam. The chain hoist will contact the 2 x 4 cap plate  portion of the 2 x 6 x 10 support beam  the 2×4  will act to distribute the point load across the 2×6 beam. See picture of my set up.
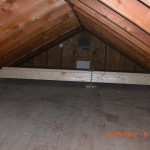
Hoist set up

Please excuse this rather long description of the chain hoist support, but proper design consideration is a must otherwise serious injury or damage may result, further as a disclaimer I make no recommendation or fitness or suitability for use or guarantee of safety for anyone who copies my support set up. Please be careful.

I attached the chain hoist to my crane beam with chain with a load rating of 2000 lbs.
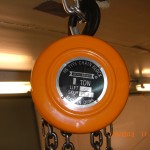
1 TON CHAIN HOIST
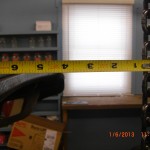
7-1/2″ BALANCE POINT

But where to attach the load leveler? I made a guess and dropped a plum bob and locate the hoist line 2” to rear of windshield. If you are following along locate the hoist line 7 ½” to rear of windshield, this will get you closer to the balance point. I used the chain supplied with the 1 ton load leveler and attached using the bolts used to locate the center console. I had some concern here the spot welds in this bracket would hold, so as a safety net I attached 1000 lb capacity tie down strap to the front load level chains and to the door hole bolts, I used larger fender style washers to prevent slip off.
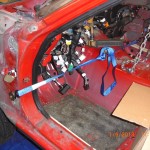
Front load attach points

I bought a 5ft length of min 1000 lb working load chain and used it instead of the shorter chain provide with the load lever and attached this chain using the shoulder belt bolts with large washers. You want the chains connected to the load level to be inclined greater than 35 degrees from the horizontal.
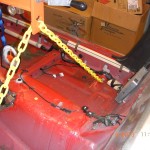
use shoulder belt attach points at rear

I am now almost ready to lift the body but I still have to remove the bolts connecting the front and rear suspension frames to the body and the bolts connecting the shock towers to the body.

So using a 14 mm socket loosen but do not completely remove all 4 shock tower mounting nuts,  there are two nuts for each shock . Do not remove the larger central nut covered by a dust cap, or the shock unit will separate under considerable pressure. If I remember you may need to remove the left side trunk trim panel the hides the fuel supply filler tube first to get access to the rear left side shock nuts.

Now time to remove the large diameter bolts that mount the sub frames to the body. You can refer to the manual page 8:12 for illustration. Remember our car is still supported by jack stands located on the body unit and not the power frame unit. So essentially the engine and PPF is hanging from the body unit.

I made a purchase of a ½” Harbor Freight (OK there is one near my location) 700 ft lb torque air Impact gun (called the Earth quake, about $100.00 to assist in removing the body frame bolts. Use 6 point impact sockets. I should mention using the recommended 90 PSI pressure this tool worked great and made  easy work of removing the body bolts.

At the front each end brake loose only but do not remove the 2 bolts using 19mm impact socket located near each front shock tower. Then break loose but do not remove 1 bolt using 17 mm Impact and 2 bolts using 14 mm impact socket at each front corner of the front sub frame. In total there are 10 bolts that hold the front sub suspension frame to the body. WARNING. Do not remove bolts, only break loose. Remember our engine and PPF is hanging from the body unit. If you remove these bolts at this time the engine and front subframe will fall on you and you will die! After front bolts are broke loose I turn my attention to the rear suspension frame.  Refer to the manual page 8:25 for an illustration .You can review in the manual chapter 5 rear subframe removal on page 5:15. Most of these steps we have already completed. Do NOT remove any bolts that connect to the PPF Unit! Using the impact or suitable breaker bar and 6 point 19 mm impact socket brake loose only( remember, the remove and you will die part) the 3 bolts each side  that are located in the area of the shock towers. They are easy to find.

At this time before I change our support base I thought a good time to take some engine to firewall clearance measurements. The cam position sensor is close to the firewall. Actually the Mazda firewall is recessed in the center to allow clearance. The distance from sensor to recessed fire wall is 1 -1/2 inch. Likewise the distance from the coil back to firewall recess is 1 -1/2 inch. The area of closest interference is the EGR pipe, which is only ½” at closest location to fire wall. The firewall offset by the way is 1 ½ inch.

I also wanted to measure the angles of the motor, transmission, driveshaft and rear differential. I was going to reference this angle to the door sills. But using my digital level the door sills were actually 0.00 absolute level, could not do that if I tried too.
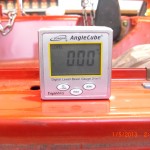
Rocker absolute level, Pure luck!

The level positioned on the valve cover is 2.10 degrees sloping to rear, hi in front.

I recorded a 2.10 at the engine oil pan. I measured the bottom of the transmission at where it connects to the PPF also at 2.10. The driveshaft at 2.80 and the rear diff at the flange that connects to the PPF at 1.95.
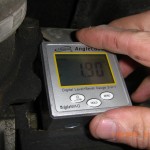
Diferential mounting angle

I wanted to make this info for record to use as reference for fitment of power train into the VortX for comparison to the factory driveshaft angles.

Now we need to move our support base. Install all for wheels and tire and snug wheel lugs, no need to torque. At this time I jacked up one end of the car at a time, removed the 6 ton support stands and replaced them with car ramps. I position the front ramps facing forward (like you would drive off) and at rear the ramps as you drive on them. Now all 4 wheels and most importantly the engine and subframes are support by the tires on the ramps. We do not have brakes, so make certain the car can not roll front or rear. Nice thing about ramps position as I have they prevent this movement.

I have a concern about what is going to happen when the shock towers are unbolted and when the body is lifted I believe the suspension will collapse onto itself and the chassis will possible drag on the ground. Certainly making it difficult to roll the chassis out from under the body after is lift. So to prevent this possibility I went to the lumber store and bought a 2 x 3x 8 utility stud. I then cut (4) 7-3/4” pieces or wood support struts from this stud. At rear I placed one end of 7-3/4” piece near outer lower wishbone. I used duct tape to position this material so the top end will contact the upper part of the subframe upon collapse. I repeat at other rear side. See pic.
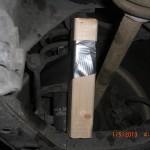
Positioning rear wood support strut

At the front I place one end of wood strut up against sway bar mount on lower wishbone and again using duct tape positioned the wood so the upper end will contact the front subframe. See pic.
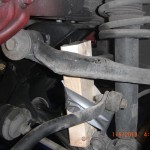
I am going to give some instruction slightly different to what I did. For reference at this time I completely removed all 8 shock tower bolts. I am going to suggest now to leave the front tower nuts several turns on. Now that the car is on safely on the ramps you can go ahead and remove completely remove the subframe to body bolts. Note at the front when the last bolt is removed the body made a rather startling pop and jumped up. This certainly got my attention and I did not expect. But what happens is the front spring preload is such that as the last nut is removed the spring quite abruptly forces the body away from the subframe. So this is my suggestion as to leave the upper tower nuts a few turns on as this should limit this explosive action. But no harm was done, and when removing the other side bolts I was expecting this to happen it was not a big deal. But it does shake the body a bit and you want the car securely supported and make sure it can not roll. I actually do not know what would happen if after all front body bolts are removed and then you follow my suggestion and remove the front shock tower bolts from above since I did not do this. Some of the preload will have already been released. But I would use caution removing these bolts if you try this method.

At the rear use 19 mm socket to  remove the rear subframe to body  bolts. Thespring  preload at the rear is not an issue to be concserned with. Now we are almost ready to remove the body. We just now have to get the tires back on the ground. Carefully jack the car up, place the jack on the center of front subframes, lift and remove ramps and lower to tire. At rear I placed jack using a wood spacer on the rear part of the PPF near the diff to lift car, remove ramps and lower to tires.
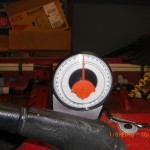
use level to verify balance point
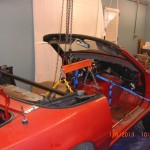
load leveler in position

It is now the moment of truth and time to lift the body off the frame.  I position a level on the transmission tunnel of the body to assist in maintaining a level lift. See pic. One more quick look around to make sure the harness, brake clutch lines,  are all disconnected and free  from PPF, engine and any part of the dive unit. I recommend an assistant for this part, this was the first time I used an assistant. For me I asked my neighbor Drew who is retired and a car enthusiast and currently restoring a “doodle bug”. I had Drew assist by operating the chain hoist while I would observe the lift making sure all is clear and the body lifts free, at the engine compartment you want to make sure the body clears the cam sensor. On my car the throttle position sensor and the throttle body linkage required some tending to. We lifted the body in 3 inch increments, and then I would do an all clear check, repeated this several times. I did have to adjust the load leveler; I would not attempt a single point lift without using a load leveler. After we found the balance sweet spot we hoisted the body until the door sills were 34 inches above the ground this allowed at least an inch clearance.
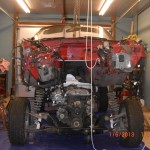
You notice I also have some rope attached to the front and rear of the body. I tied these ropes off as a safety precaution to prevent to body from tilting. I simply pulled in the front sway bar and easily moved the chassis forward and clear of body. I position by jack stands in position at the same 20 inch height as before and lowered the body till lift cables are slack.Mission completed. It is nice when a plan works according to plan.

At the end of my last post I asked the question if this method of power train removal would either be a good one or a dumb one.

Having completed this, It was a GOOD idea. I would certainly do this again. I do not think it takes any more time this way. There were several steps in chapter 4 from 82 to 95 you do not have to do. It only takes about a ½ hour or so to loosen the body bolts. Now I am in a position where I have unrestricted access to remove the rest of the harness from the body unit and the same goes for the separated power frame unit. I should also make say I had a good donor car to work with. It has very little rust and came apart easily. As a help hint I typically would spray the next days bolts to remove at the end of the day. This may have help make this car disassemble easily. From start to this divorce of body and power unit I have about 27 hours invested so far. I am not counting my time to take e-bay pictures, or time to build the crane support and certainly the time to write this blog.
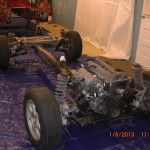
Easy access to donor parts

I will make one final comment. I forgot to measure the height of the Miata door sill before the lift; I would guess this around 10 inches. So if you have a simple engine crane with a 1000 pound lift capacity and have a lift range a little over 24 inches this should work fine. If the crane could be positioned so the legs could be roll from the rear between the Miata’s rear tires, this would be the easiest way to go, especially if you only plan on doing this procedure once.

Next is to finish removal the main wire harness from the body unit. I should be making post more often.
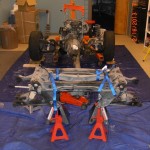
Removing miata donor parts 3 of 9, Sawed out the core support

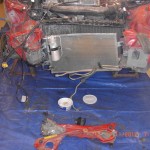
I decided now is a good time to shift focus to the exterior. What I want to do is salvage the wiring harness from the crash damaged area. The portion of the wiring harness that feeds the front combination lights (turn signal & running lights), headlights, side marker lights, horn, headlamp motors, air bag module and cooling fans are rather engulfed in mangled metal on the passenger side. A big hammer and pry bars were the tools of choice and after about 3 hours time I was able to extract the harness from this crushed area.  I was lucky and did not have to cut any of the harness and except for some minor chaffing to harness near the right side marker I was able to save the harness and keep it intact and undamaged. Next step and prerequisite to engine and transmission removal is to remove the radiator and AC condenser core. For this step please consult your Miata enthusiast work shop manual. But in my case standard procedure will not work per the book as the radiator and condenser as well as the core support are rather a single unit, pushed into each other due to the accident damage.  One reason I needed to remove the harness first was I realized that I would need to saw out the core support as this would be the only way I will be able to remove the radiator and I wanted the harness out of the way of my planned saw cuts. I used an inexpensive $35.00 Harbor freight electric Body shop saw to cut through the core support. Notice I marked out in black marker(see pic)

Core support marked for surgery

my planned cuts to remove the core support. I used about 5 blades to complete the job and feel I rather abused the tool but it got the job done and worked great. And now I have easy access to the radiator removal and an idea.

cut out support allows easy access to remove rad and AC condensor

Now would be a good time for some commentary regarding crash damage and donor car selection. One should consider the where and extends of damage and how this may add time or complicate the disassembly. In my case the crash damage added approximately 5 additional hours, but  from this point on I will no longer need any additional time dealing with twisted metal. My salvage donor car was advertised by Co-Part as start and drives. Which means it starts with the key and will engage gear and move. The car was able to drive itself onto the trailer and that is about it. I am suggesting more caution should be used to purchase cars with front end collision damage, after all,the engine is the most expensive and valuable component we will be purchasing. My donor car seems to be in good condition prior to the accident and so far so good but do feel a bit lucky the engine was not damaged in the crash.

Now what’s next.  I will be reading chapter 3 on the how to remove engine and transmission as a unit in the Miata MX-5 enthusiast manual, which for now on  I will just say “the manual” when referring to this book, but I am currently not planning to follow the manual to the letter but will use as a guide as to what needs to be disconnected. I am considering leaving the engine and transmission bolted to the Power Plant Frame(PPF), and unbolt the front and rear sub-frames from the body and then lift the body off the car and then roll the engine still attached to front sub frame suspension unit with  transmission and rear sub frame differential suspension unit. In other words a Miata body less roller. Others have done this before. The manual discusses this option but decided they could not see any benefit as compared to the procedure they outline in the manual, but the manual is not considering additional harvest of parts, or starting with a salvaged car and the eventual scrapping of the body. But by doing so I will have even easier access to remove the harness from the body shell and complete unobstructed access to the brakes and power train components we need. I had ruled this out as my shop ceiling is standard height and did not want to find out I could not lift the car high enough to clear the engine and transmission. But what has now inspired me to give this method a try is by sawing out the core support for removal of the radiator I can now see how I no longer have to lift the car body over the core support but actually can roll the “engine chassis unit ” through where the support was.See first pic. That and this car is a rather rust free example and I am counting on the sub frame bolts to cooperate. If not I can always follow the manual and remove the engine and transmission in the standard format. Stay tuned to see if this is good idea or a dumb one.


Removing miata donor parts 2 of 9 Stripping the firewall

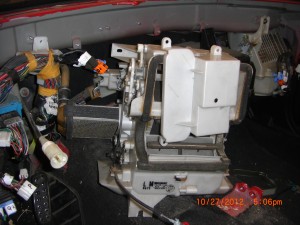
Seperate core from mixing unit

10-27-2012

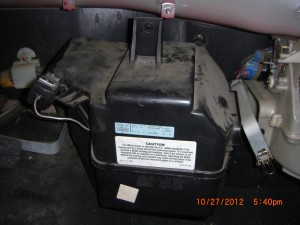
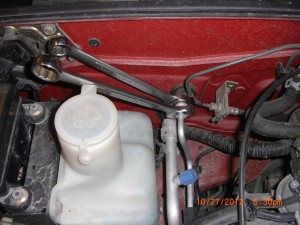
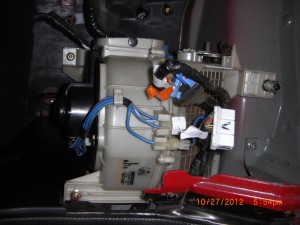
Continuing where we left off. The plan is to strip the fire wall to gain full access to the wiring harness in front of the firewall. To do so we need to remove the heater control mixing box that contains the heater core, the AC condensing unit and then the blower fan box. We start with by unclamping the heater core vent clamps, then using a 10 mm socket remove 2 upper nuts and 1 bottom. Pull the box forward. You will need to angle to allow access to remove the plastic side cover located by the core’s supply and return lines, remove the 2 Phillips screws and pull off cover. Now angle, see pic above, the core housing and pull and wiggle to facilitate separation from the core element and put mixing box in the discard pile. Next up we remove the condenser unit. Open hood and at rear firewall we need to disconnect the AC supply and return lines from unit. I should note if your system is charged to appropriately remove the refrigerant. I disconnect the  top line first using a 17mm wrench on the inner but and ¾ on outer and moved out of the way to get access at lower line and using 1” inner and 1 1/8” wrench for outer this line was quickly disconnect. Now from inside the car use 10 mm socket remove condenser housing retaining nuts .Unsnap and remove duct clamp. Pull housing forward and remove the condensation drain hose,

remove moving the condensor unit

Disconnecting refrigerant lines at firewall

see pic, remove unit from car and put in the pile. Finally we remove the blower fan.  Use a 10 mm socket remove 1 upper top bolt and 1 nut located lower right and another nut located lower rear left

removing 10 mm nuts and connectors

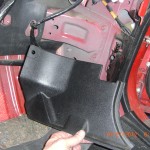
. Make sure wiring harness is unplugged (and tagged for future reference) and pull forward and put in the pile. Now we have excellent accessibility to the wiring harness at the fire wall. It is obvious it continues under the carpeting. So I will now remove the carpeting. First I removed the lower drivers and passenger foot well plastic scuff panel by just prying off. Then I removed the plastic and metal door sills, 4 screws each.

remove foot well trim

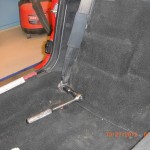
removing seat should bolts for

I then removed the seat lap belt retainer harness using 17 mm socket for passenger side and oddly enough a 16 mm for the drivers side. Remove the shoulder belt retaining bolts next.

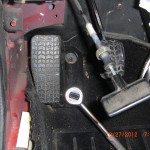
use 10 mm socket to remove clutch rest

Now using a 10 mm socket remove the 2 bolts that secure the clutch rest. Now we are all clear to remove the carpeting. The carpeting is typically held in position by ½”dia. plastic headed one way push on speed nuts. If you want to save the carpet you should remove these by prying off under the head of fastener, see pic,

the correct way to remove trim clips

otherwise you will tear carpeting, I do not plan to reuse the carpeting and must admit to pulling and yanking as my primary method of removal. Start by removing the carpeting by the rear window that covers the fuel tank.

removing carpet over fuel tank

Then I remove the carpeting that is behind the seats. Then after making sure all wires are fed thru the floor carpeting you can simply grab it from the rear and pull back and up and lift to  remove and put in the pile. As you have already observed you have exposed the location of the Power Control Module that hides behind the passenger seat carpeting and  it’s  associative harness. see pic.

PCM and harness along right side

Now this PCM and harness is a keeper we will need for the VortX. So this segment went very quickly taking only about 2 hours to remove all the parts that are in this pile, see pic,

pile of parts for discard or e-bay

none of which are needed for the VortX but many can be listed on e-bay.And a pic of our naked and exposed wireharness at firewall.
stripped firewall and exposed harness

What’s next? Note sure. Need to study a bit. What I absolutely recommend and I consider mandatory is purchasing the  Enthusiast’s Workshop manual for the Mazda MX-5 Miata 1.8L There is also an addition for the 1.6L. I purchased mine at Amazon. The author is Rod Grainger and Pete Shoemark published by Veloce Publishing. For the 1.8L the ISBN # is 978-1-845840-90-7   The UPC# is  6-36847-04090-1.  I will later get the numbers for the 1.6L manual. I will post this info on Reference page when I get a chance. That went pretty easy, So far I have a total of 9 hours in donor.


Removing miata donor parts 1 of 9 or where do I start?

We start by removing the dashboard


Getting started . My first thought is where do I start?

Most build blogs I reviewed do not chronicle the disassembly process in much detail, and why should they as this part of the build is not much fun and is a matter of necessity. But on these pages I hope to post for record the disassembly process I used. I am sure  at the end of this parts harvest I will be more qualified to make recommendation of what or how I would do differently.

At this stage of the build I am still planning of using the factory wiring harness and have decided to start this build by removal of the dash and necessary interior assemblies to allow full access for easier  removal of the harness.

I started by removing the interior dash panel. Refer to this dash removal file.DashRmv_89_93 This is an excellent tutorial with quality photos prepared by Anthony Meeks for Miata owners for a step by step “how to” for dashboard  removal for 1990 to 1993 Miata. My donor Miata is a 1994. I found the procedure to be very similar. On the 1994 there no need to remove the air vent closest to the side widows. There are less screws to remove at glove box. The wiring harness connection will vary somewhat too. But in general just follow the instruction and you will succeed.

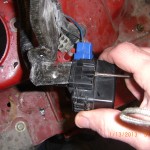
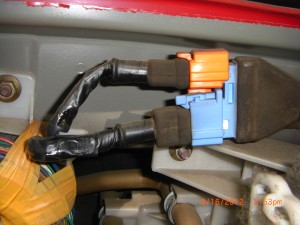
The instruction indicate to be very careful when removing the instrument panel cover. This is an understatement. I did break a clip or two during the “wiggling” back and forth process and I did not think I was using much force. The good news is I believe if you plan on using the donor instrument cluster you may need to “trim” the cover to suit the vortX dash shape and the clips are in the area that will need to be trimmed. But at this point of the build I am not sure and recommend extra caution  during this step. Also some notes when you come across the orange/blue connectors, these connector were a bit challenging to get apart.
Blue and orange connectors

you will need to remove the orange one first then the blue one see pic, To do this you need to press hard on the orange clip release  while at same time pulling back. I found where room permits to use a very small screw drive and using like a tongue depressor press down on the flat tap and pull. The blue will release easily after orange is out of the way.

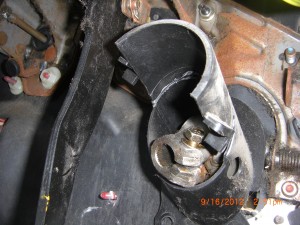
lower column protective boot

Removal of the top half of the lower steering column U joint protective cover see pic is not covered in the dash removal instruction but is easy enough. You will need a 10 mm socket to remove 3 nuts that hold the column in place. You may need to cut or depress some of the firewall sound deadening insulation to get the socket on , but the good news in comes free after the 3 nuts are removed. I retained this part as it may be useful to serve it’s protection duty in the VortX.

Also I labeled all my connectors as I took them apart.. The system I used was to use self stick labels I bought at Wal-mart. They are about 1/2” by 2”. I would wrap an identification letter/numbered tag around the wires of the male connector and an exact same number tag around the female side of the connector. I also used a permanent marker and noted same numbers directly to the connecter halves. I also used a note book and kept record of every Letter/number of every connector I pulled apart. I would also make a note as to the location of the connecter and if I could determine what the connector is used for in a note book. An example of a note would be D19= steering column, igniton switch gear.

The D would symbolize the general area is the dash, steering column give more precise location and ignition switch gear indicates where the connecter was used.

Often I did not have the third level of location. As D18= Dash, near column, main harness connector. This would mean general area of Dash and was a harness connector. It did not terminate at a device but was junction connection.

You can devise any system you want to use. But I think it to be a good idea to use a system that defines the area. For me D= Dash area, E= engine compartment, T= Trunk, PC= power control module, etc This way when harness is removed you can lay it out with reference to the to the general components of the car.

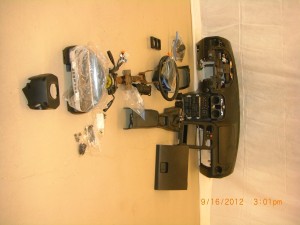
parts removed time 7 hours


Anyway after following all the steps in the dash removal instructions and 7 hours of time  I had the pile of parts removed in this photo.

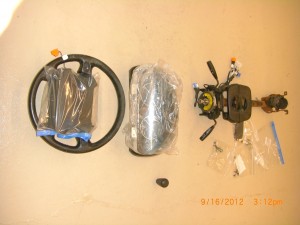
But we only need the parts in this photo which include the

lower steering column UJ split plastic protection cover.

Steering column with all factory switch gear.

Split plastic switch gear cover and screws. Includes removable 2”x 4” cover.

Solid state instrument panel.

Instrument panel cover

Steering wheel

Gear shift knob.

All hardware for above.

Not pictured but retained for possible use.

Gear shift lever leather boot.

Hazard/pop up light switch.

Center console light.


This ended day one work.  Allow about 7 hours but if you work without interruption you will probably use less time.

9-16

What is next?

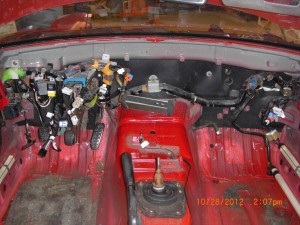
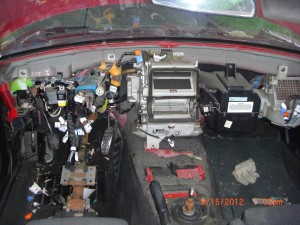
Here is the picture of inside of car after removal of dash. Here you can see the maze of wires and I must admit this can seem a little intimidating as this stage.

Dash removed and wire and more wires,

For lack of a plan I removed the seats. This was easy enough. Only 4 bolts per seat. My passenger seat required and extra bolt to remove for the shoulder harness. I believe I used a 24 mm socket. I now find the room to work has improved and since we are not going to reassemble our car, I would recommend making this the first step before dash removal as it will make working under the dash more comfortable and takes only 10 minutes.

Next up. As you can see in above picture the  the main wiring harness disappears  behind the heater core housing and blower fan housing. So these are my next targets for removal.


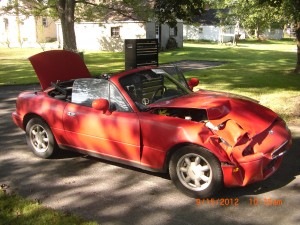
The donor car , and post #1.


transplanted parts will see better days in the VortX.


Pictured is the  1994 First Generation Miata ,Fastcraft motorsport is using for this Build. This car was purchased for a winning bid of $900.00 from the Copart on line auction service. Has 109,269 miles on the clock. The car starts and can be driven slowly. The model year of 1994 was my preferred year. This year and most all 1995 are ideally suited for turbocharging as the compression is lower at 8.8 :1  for these years and the block has blocked off NTP supply and return ports to feed the Turbo charger bearings. Also this year the transmission is more robust and 1994 was the first year I believe to use the larger 7″ ring and pinion. I still have not determined if  this donor has the rather rare Limited slip. Would be a great bonus to find out it is a Torsen LSD but I am not counting on it.Also 1994 and 1995 cars are the last two years before the engine management system has to be ODB 2 compliant. The engine starts easily and sounds good, very little blow by and oil looks good. You always are taking a chance when you buy with out seeing and inspecting in person but I  am pleased with this donor purchase and my winning bid was the max I had set for donor purchase. I wanted to buy the car this way for the experience of using this on line auction. As these salvage cars from Copart are often available for less than $1000.00 they may be a good donor source for our  builders, and at this price for a donor with serviceable engine and drivetrain we are on target to build the affordable performance car for around $15,000.00 target budget for a no frills build..