Repacking Miata front hubs
Here we are disassembling and cleaning the front hubs in preparation to repack with grease.
The manual says the front hubs are not serviceable. This is partially true but I did learn on the Mazda racer spec Miata community forum that most all serious Mazda racers repack even brand new hubs as normal race prep. This forum http://mazdaracers.com/forum/100-spec-miata/ is excellent to learn about these techniques and other Miata set up items.
As to whether we should do this will be a topic for discussion at a later date. But suffice I decided to do the hub repack as I wanted the experience of how to do this procedure.
My post here is only to supplement this very excellent article I believe was originally posted by Karl Zimmerman on the Mazda racers forum. Please click Repacking front Hubs for the full text of how this is done step by step. The photos and text are excellent.
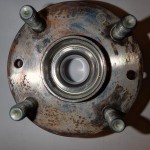
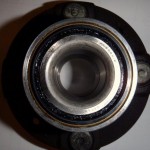
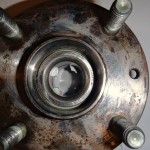
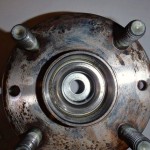
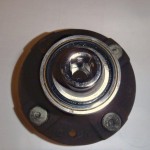
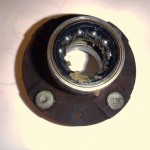
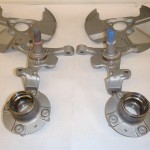
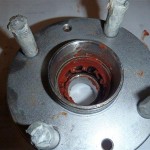
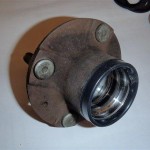
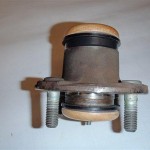
As we noted during the parts Harvest my donor hubs had an almost nil amount of play and being quality NTN hubs I decide I will repack for use in the VortX. Grease is cheap. See pics of front and back donor hubs.
Label each hub for reassembly. Example DS for Drivers Side, I used A and B, put if doing again would rather classify as DS or PS (passenger
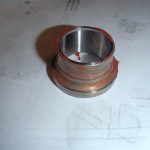
side). I recommend using the 4 washer method as in article. As you can see I had a fender washer at hand and cut in 4 pieces to do the same job. I did supplement the 4 washer method by placing another larger washer on top of the 4 individual washers; my thought was this will allow the socket a more level surface to press against for removal of race. It did not take much force to tap out the race.
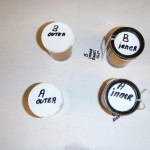
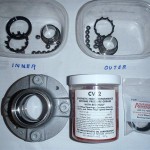
Round up some baby food containers or prescription bottles or some type of suitable containers to keep the removed bearing races, holders and bearings separate. So you will have Hub PS and separate container for Hub PS inner and Hub PS outer races, holder and bearings. You will also have same for the DS hub. See pic of how I organized the parts.

But before I repack the bearing I decide if I want to clean and repaint the hubs now is the time. The cleaning is a necessary step but the prep and paint is for cosmetic only.
It is important not to get these parts mixed up or premature failure is almost certainly to result so be careful.
FYI you can use a 1 1/8″ in socket in place of 29mm as called out in instructions.
Please click Repacking front Hubs for the full text of how on this proceedure. My pictures are only to supplement.The dissembled hubs are solvent cleaned in the parts washer and then washed in dawn dish soap, applied some WD40 to bearing surfaces to prevent any flash rust to machined races. I decided I would clean hubs exterior surface rust in the blast cabinet in preparation for paint.
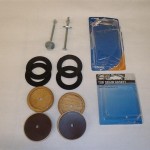
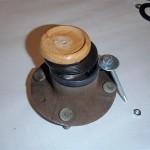
If I would do again I would use the chemical method I used to clean the calipers for rebuild. I will describe in the Caliper rebuild. As you can see I went to great lengths to prevent and media and later paint from entering hubs and getting on race surface. I used black electrical tape to cover the inner circumference edge of hub. I was as the home depot and I found some bathtub drain gaskets and round furniture sliders with Teflon face that I would use to make seals for the open ends of the hubs. Bought some 3/16” bolts nuts and washers to compress the gaskets and sliders against the hub ends, I even went so far as to use silicon applied to the washers to further seal out media. See pic.
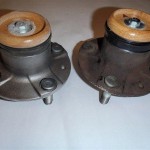
This actually only took a few minutes to prepare for use. as I only had to drill 3/16” holes in the center of the sliders and then screw together with the hubs as the middle of this sandwich. It did work great. See pics of hub sandwich. I media cleaned, air blasted and then washed the hub sandwich in dawn soap to prepare for paint.
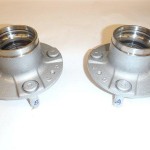
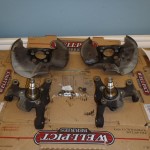
I painted the Hubs with KBS silver rustseal coating. While I had the spray equipment out I also painted the spindles and brake covers with Bill Hirsh aluminum engine enamel. Bill Hirsh offers several quality paints at www.hirschauto.com As you remember I had previously primed the spindles. The KBS rustseal coating I used for the hubs is applied to the bare unprimed media cleaned surface as no primer is recommended for rust prevention. If the parts are to see direct sunlight this KBS rustseal coating will need top colored top coat. but the hubs are not in sunlight and besides hubs are maintenance items anyway. I then applied to all painted parts KBS diamond finish clear coat. This needs to be applied within 45 minutes of top coat or you will have to do additional surface prep so plan your paint work in advance to save time. After the paint was dry I removed the bolt and the Teflon surface made separating the sliders easy. I wish I could take credit and say I planned it that way, but actually I was going to use plain wood when I saw the sliders for sale on the way to the check out counter and they were the correct diameter and did not require any effort for me to cut any wood to size. So now we have cleaned, blasted and, painted hubs.
I also learned from the Spec Miata forum that Red line Synthetic grease is the most recommended go to grease for this job. I thought I would have to wait and order this grease but after going to redline web site I found out there is a redline distributor only 1 mile from my shop I did not know about! Most hub packers re-use the old seals but I purchased new seals. These are not available from Mazda, but Dave Wheeler of Advanced autosports www.advanced-autosports.com has went to the effort to have replacement hub seals manufactured for the hubs and are available at Dave’s website for racers to purchase. Dave has also authored a book I recommend title the Spec Miata Constructors Manual and is worth the read. I did not damage my seals during removal and could have reused, but decided to use seals the new seals.
Here is one hub. I have allready cleaned the hub races thoroughly with WD40 and also all bearings, inner races and holder are cleaned and put in labeled sanitary container ready to be repacked.
So with Red line grease in hand and my new seals and the above file on display on my computer screen it is time to get on with the repack.
I start by repacking the hub’s rear race first. This is the easy side to do. I applied Red Line synthetic grease to holder and installed the ball bearings. Pay attention to how the bearings fit into the holder. Notice you are pushing them in from the outside or downward as you are viewing from above. If you try it put bearings in center of circle and then try pushing from the center of the circle to outside of the circle they will not go into place and too much force may break the holder. Make note of this as this technique
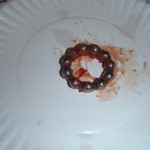
will come in handy when you install the front side holder and bearing.
Next I applied a liberal amount of grease to the inner hub race and then dropped the holder with bearings into the bed of grease. I applied some grease to outer inner race and with aid of socket I tapped into position see pic. Then clean up the extra grease and take picture.
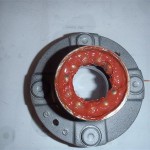
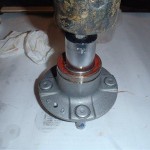
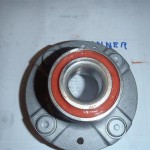
So far so easy. Now we turn the hub over to repack the front race. This is a bit more difficult. First I applied some grease to holder and work into position. This is the scary part as if you break the holder you can only get the holder when you buy a new hub! I found holding the holder about 60 degree angle from horizontal worked best for me. You will have to compress the holder slightly to get into position. You may not want to do this in cold temperature, not sure but winter temp may affect the pliability of holder. Once the holder is in place it is time for our next dexterity test. It was so easy to install the bearings when they are on the work bench; I thought this would go fast too. It took me a few times to find the best technique. Like the article says, installing the bearings 180 to each other in sequence does help. But the trick is to hold the retainer in position with the index finger of one hand and push the bearing with the index finger of the other hand, Like you are trying to hold the bearing between the tips of your pointed index fingers, remember the bearing go into place from above easy when we did the holder on the bench, Same here. Once this is done you are home free. After bearings are in place apply a liberal amount of grease and coat the front inner race with grease and tap into position.
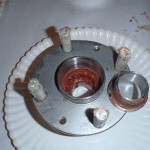
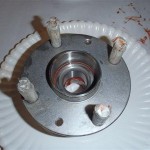
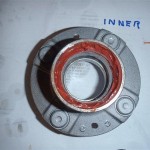
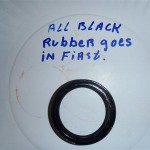
Next tap in the front inner race and all I have left to do is to install the inner seal. See pics for orientation.
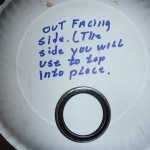
Just start the seal square , I was able to push on by hand and then used a socket and lightly tapped to verify fully seated. I was able to repack the other hub in half the time. Overall repacking the hubs is nothing to be afraid of . If your donor has quality hubs with play within spec, why not repack and reuse? On the other hand if your donor has low quality hubs and you plan to take to take your VortX to the track you may as well just bite the bullet and buy new hubs now.
Looks like the front brakes are missing,
So the next post will be rebuilding the Calipers.
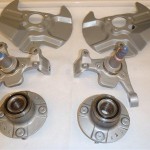
Before and after pics here.
